


We just completed a bathroom renovation. WashroomX2 I call it- turned the kids bath into a laundry as well. (see the kids bathroom and laundry room remodel here). I knew I wanted to add a fun something on the wall. So of course I headed over to Pinterest.

Because I knew the color scheme would be based on black and white, Silhouette images caught my eye. I also was looking for ways to add in more color and thought the silhouette would “pop” nicely off my accent color. I saw a couple ways to make them yourself (paint on the back of a picture and then cut it out, print on black paper.) I ultimately decided on the technique below, it really is quite easy.
How to Make a DIY Silhouette Portrait

Supplies:
- Printed profile pictures
- black construction paper or scrapbook paper
- very sharp scissors
- pencil
- background paper
- glue stick
- frame and/or mat
Instructions:
1. Take a profile picture of your kiddo. I chose to do it on a plain wall just so the image would be clear of distractions. I would take a couple to be sure you get the right “look”. Also, if you are taking pics of multiple kids do it at the same time and from same angle. Be sure to include the top of their shoulders too, this way the profile image doesn’t just look like a floating head.

2. Next print your photo. I opened a Word doc and inserted the image. Then I resized the image a little. Since I knew I was using a 4X6 mat, I made the image a little smaller than that. I also made sure the size was the same for each child. I printed in black and white. I think it gave more “dimension” of the feature details. I have also seen people go to the next step of “removing” the background- doing a crop all around the head. But I didn’t think this step was necessary, it was easy enough to just cut on the “dotted line” so to speak.
3. Now cut out the profile. Be very careful to not cut off any feature. The cutting for this project really works best with a very sharp pair of scissors. I have a pair of Scotch scissors that I keep them “hidden” to keep nice for use on projects like this. 😉
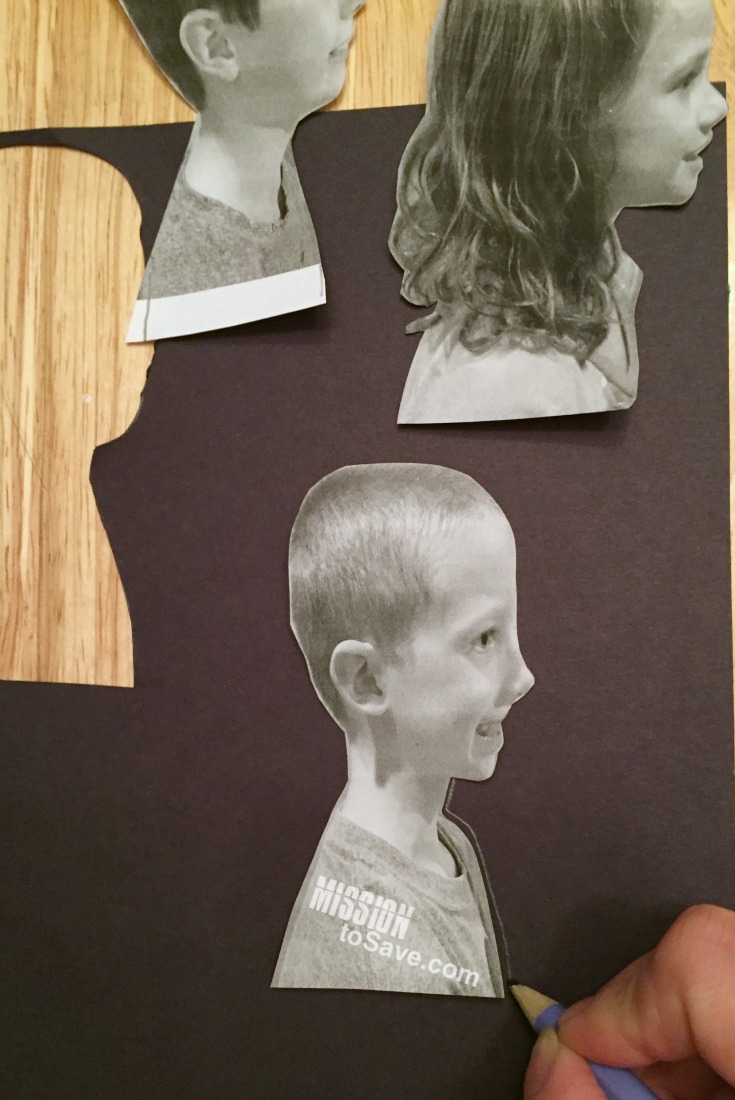
4. After cutting the profile, trace around the image into the black paper. Again, using a sharp pencil is best. I also think that the construction paper would work better than a scrapbook paper because it is not as thick to cut through.
5. After profile is cut, glue the image onto the center of your background paper. I just used a school glue stick.
6. Place in a frame. I used a frame matting as well to add “depth” to the project. Thanks to frames bought from Big Lots during a 20% off weekend and mats and scrapbook paper from a craft store (with coupon)- each picture was just under $10.
7. Tada! Finished project!

So what do you think? I am LOVING them. Each one has a particular “feature” that makes it clear who is who (curls on my girlie, a little “cowlick” on my big boy and the curve of his nose on my middle). I can see why these have been so popular for centuries! Captures their precious faces in a special way!
You can also watch me do a little demo of these on this Hometalk LIVE video

 I am on a mission to help you save. Join me on this frugal living mission and together we will learn how to save more, so we can do more living and give more too!


